
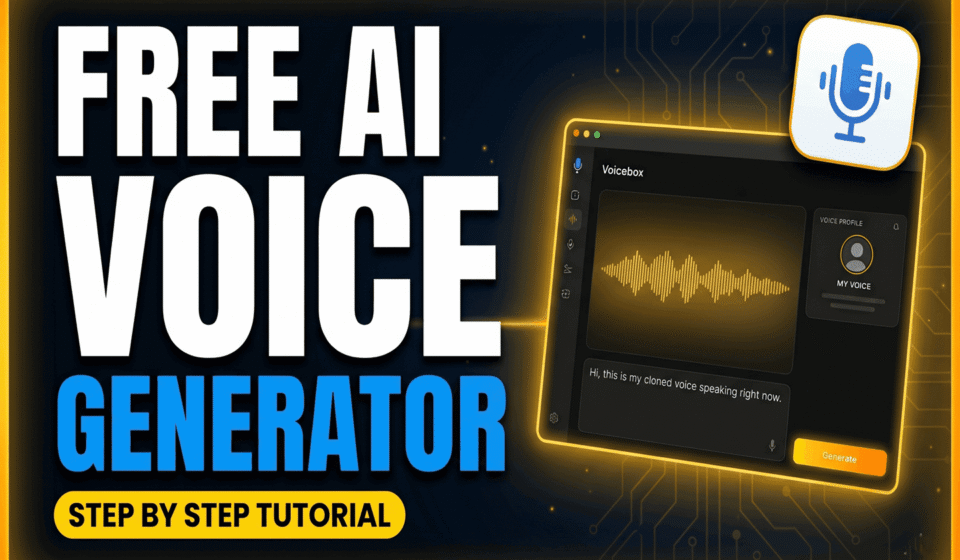

If you’ve been searching for a way to clone a voice without paying a monthly subscription or uploading your audio to some company’s cloud server, you’re in the right place. In this guide, we’ll walk through Voicebox — a completely free, open-source AI voice studio that runs entirely on your own computer.
By the end of this tutorial, you’ll know how to install Voicebox on Windows or Mac, create a cloned voice profile, generate AI speech from text, and even build a multi-voice conversation using the built-in Stories editor.
We also made a full video walkthrough if you’d rather watch than read: This 100% Free AI Voice Studio is Insane on the AI BrainBox YouTube channel.
What Is Voicebox?
Voicebox is a free, open-source AI voice cloning and text-to-speech application built by developer Jamie Pine. Unlike most AI voice tools on the market, Voicebox doesn’t run in the cloud — everything happens locally on your device, meaning your voice recordings never get uploaded anywhere.
The app is powered by several leading open-source AI speech models, including Qwen3-TTS, Chatterbox, LuxTTS, and Kokoro. Each one has different strengths, which we’ll cover later in this guide.
Here’s what you can do with it:
Clone a voice from a short audio sample (as little as a few seconds, ideally closer to 20–30 seconds for best results). Generate natural-sounding speech from any text using your cloned voice. Build multi-speaker conversations using the Stories editor, similar to a mini podcast studio. Apply audio effects like radio, echo, or deep voice to any generated clip.
The project is open source under the MIT license, which means it’s free for personal and commercial use, with the source code publicly available for anyone to review.
Is Voicebox Really Free?
Yes, Voicebox itself is completely free, with no subscription, no usage limits, and no required account. Most of the AI voice engines built into the app (Qwen3-TTS, Chatterbox, LuxTTS, and Kokoro) are also fully open source and run locally at no cost.
One small exception worth knowing about: if you choose the HumeAI TADA engine inside the app, that specific model connects to an external API and has its own separate free-tier limits. If you want to keep everything 100% free and fully local, simply stick to the other engines mentioned above — they cover the vast majority of use cases anyway.
Before You Start: A Quick Note on Ethical Use
Voice cloning technology comes with real responsibility. Only clone your own voice, or a voice you have explicit, informed permission to use. Never clone a public figure, celebrity, or another creator’s voice without their consent — doing so can violate platform policies and, in many regions, the law.
If you plan to publish AI-generated voice content on YouTube or another platform, check that platform’s current disclosure requirements for synthetic media before uploading.
Step 1: Download Voicebox
Head over to the official Voicebox website at voicebox.sh and scroll down to the download section.
You’ll see separate download options depending on your operating system:
If you’re on Windows, download the Windows installer file. If you’re on a Mac, choose the installer that matches your machine — Apple Silicon (M1 and newer) or Intel, depending on your hardware. Not sure which one you have? Click the Apple logo in your top menu bar, select “About This Mac,” and it’ll tell you.
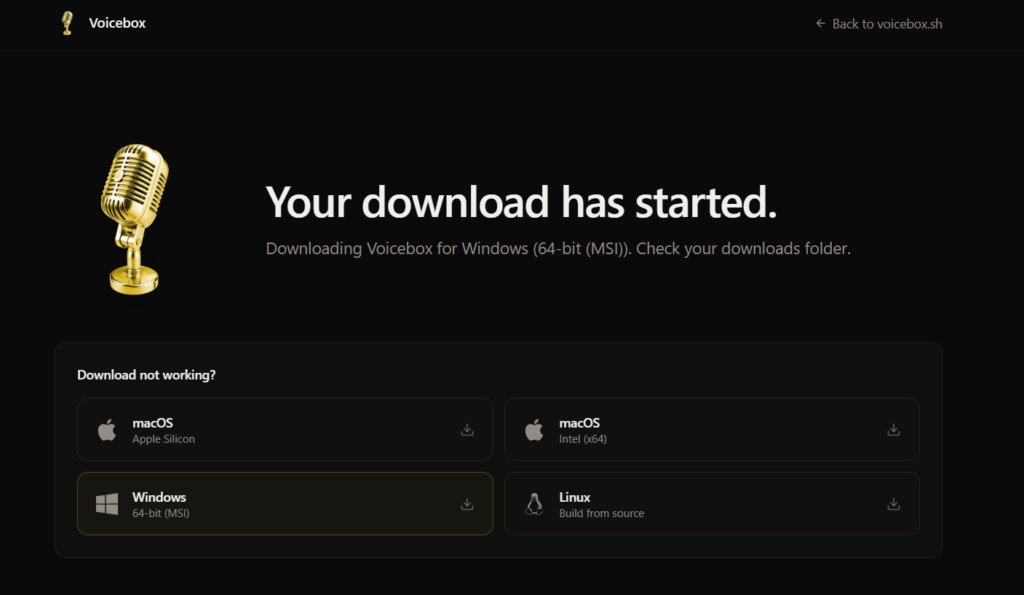
If you’re on Linux, Voicebox doesn’t currently ship a pre-built binary, but the project provides a build-from-source guide on their GitHub repository.
You can also find the full source code and release notes on the official GitHub repository: github.com/jamiepine/voicebox
Step 2: Install the App
Once your download finishes, open the installer file.
On Windows, you may see a security prompt from Windows Defender SmartScreen since this is newer open-source software. This is expected behavior for many open-source apps that haven’t yet built up a long download history with Microsoft. Click “More info,” then “Run anyway” to proceed. Then walk through the setup wizard: accept the license agreement, choose an install location, and click Install.
On Mac, open the downloaded file and drag the Voicebox icon into your Applications folder. If macOS shows a warning about an unverified developer, go to System Settings, then Privacy & Security, scroll down, and click “Open Anyway.”
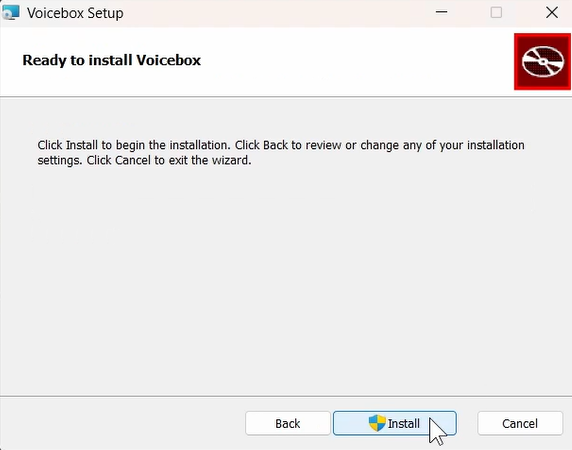
Once installation finishes, launch Voicebox. The app may take a moment to initialize on first launch.
Step 3: Create Your First Cloned Voice
This is where the actual voice cloning happens.
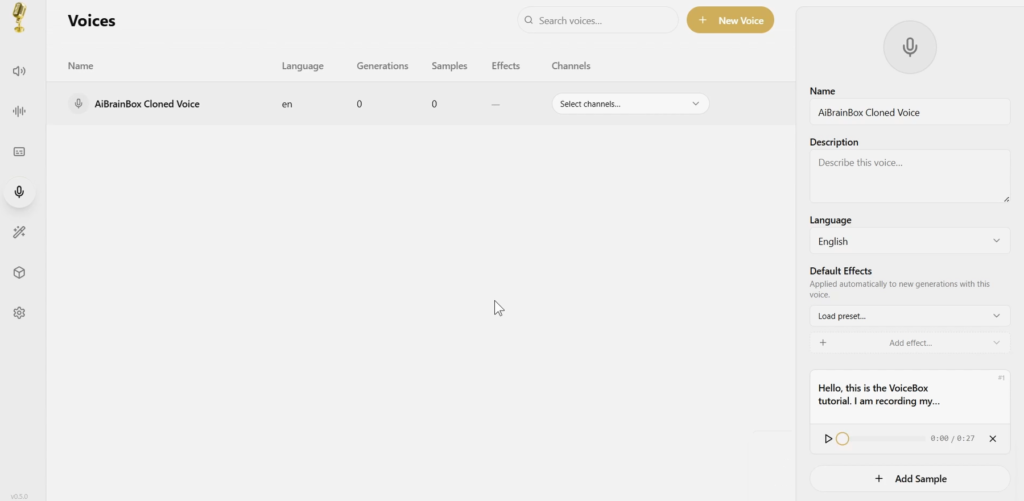
In the left sidebar, click on the Voices icon, then click the Create Voice button in the center of the screen.
You’ll be given three input options:
Upload lets you import an existing audio file from your computer. Microphone lets you record a live sample directly inside the app (up to 30 seconds). System Audio captures whatever audio is currently playing on your device.
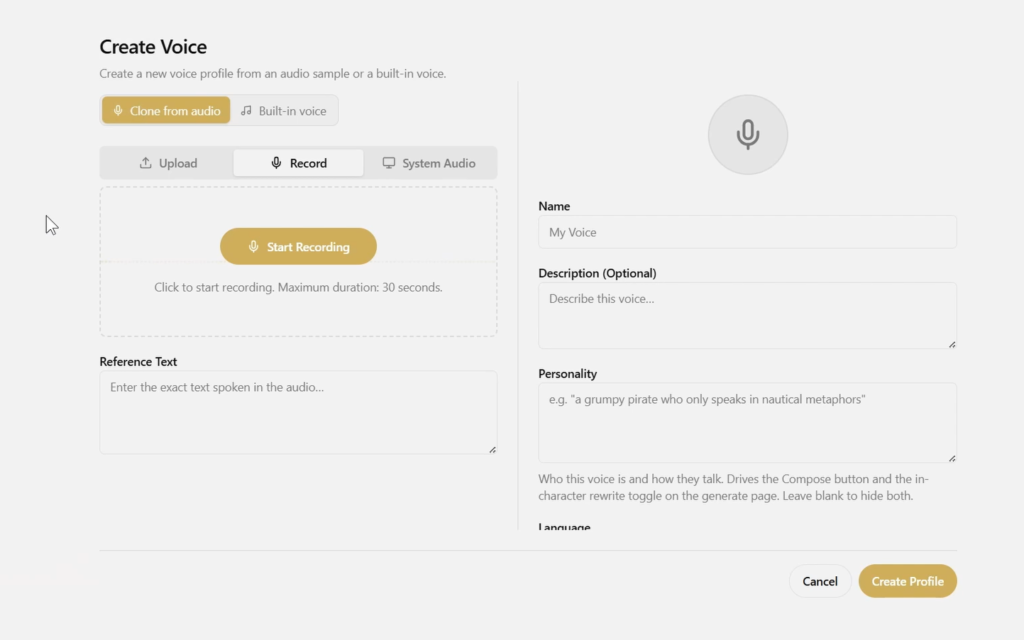
For the cleanest results, record in a quiet room with no background noise, and try to get as close to 20–30 seconds of speech as you can. Speak naturally, the way you normally talk — don’t over-enunciate.
Once you’ve recorded or uploaded your sample, click Transcribe. The first time you do this, Voicebox will download a small speech-recognition model to convert your audio into text. This only happens once.
After transcription completes, give your voice profile a name, then click Create Profile in the bottom-right corner. Your voice is now saved and ready to use any time.
Step 4: Generate AI Speech From Text
Now for the fun part — making your cloned voice say something new.
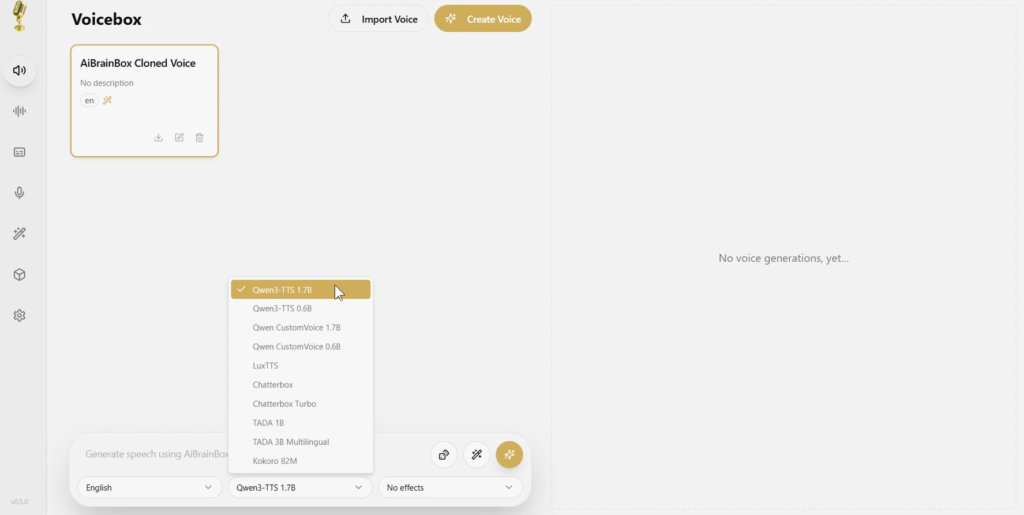
At the top of the generation screen, select the voice profile you just created from the dropdown menu. Next to it, you’ll see an engine selector. Here’s a quick breakdown of the main options:
Qwen3-TTS offers high-quality, multilingual speech and lets you give style instructions like “speak slowly” or “sound excited.” Recommended as your default starting point. Chatterbox Multilingual supports 23 different languages, ideal if you need non-English output. Chatterbox Turbo is fast and supports emotion tags like [laugh] or [sigh] directly inside your text. Kokoro is extremely lightweight, runs instantly even on older hardware, and ships with over 50 preset voices.
Type the text you want spoken into the input box, then click Generate. Processing time depends on your hardware, but typically takes a few seconds to under a minute.
Once generation finishes, click play to preview the result. If you’re happy with it, click the three-dot menu and select Export to save the audio as a WAV or MP3 file. If not, hit Regenerate to get a fresh take — each generation uses a different random seed, so results will vary slightly each time.
Step 5: Build a Multi-Voice Conversation With Stories
If you want to create a dialogue between two or more voices — useful for podcasts, audiobook-style narration, or character conversations — Voicebox’s Stories editor handles this natively.
Click the Stories icon in the left sidebar, then click New Story and give it a name.
At the bottom of the editor, type your first line of dialogue, select which voice profile should speak it, and click Generate. Add your next line, switch to a different voice, and generate again. Repeat this for as many lines as you need.
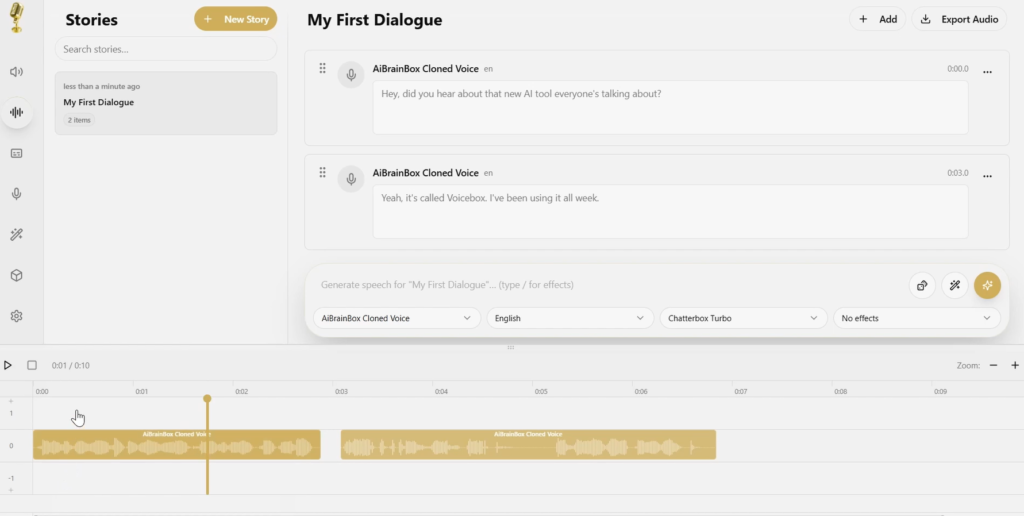
The Stories timeline supports drag-and-drop reordering and timing adjustments between clips. Once you’re happy with the full conversation, click the export button to merge everything into a single audio file.
Step 6: Add Audio Effects (Optional)
Voicebox includes a built-in effects section with several presets: Robotic, Radio, Echo Chamber, and Deep Voice. You can apply these to any generated clip, or build a fully custom effect chain using individual tools like reverb, delay, compressor, and pitch shift.
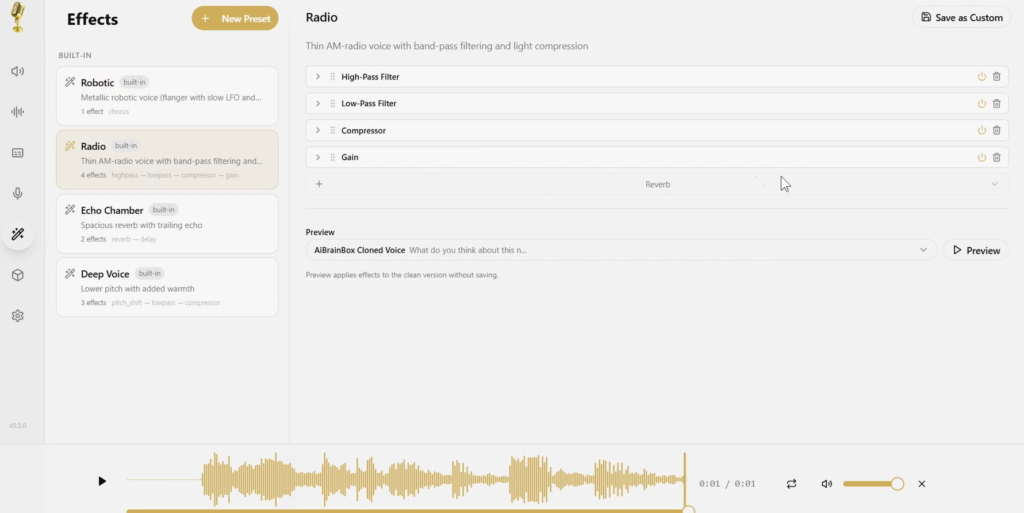
You can also assign a default effects chain to a specific voice profile, so it always sounds the same way without reapplying effects manually each time.
Tips for Getting the Best Results
A few practical tips that make a noticeable difference in output quality:
Record your voice sample in a quiet space with minimal background noise. Aim for 20–30 seconds of sample audio rather than just a few seconds. Speak at your normal pace and tone rather than performing or over-enunciating. If a generation sounds slightly off, try regenerating it two or three times before giving up on it. If you have a dedicated GPU, enable it in Settings for significantly faster generation times.
Frequently Asked Questions
Is Voicebox safe to use? Voicebox is open source, meaning its full code is publicly available for review on GitHub. Because it runs locally, your voice data isn’t uploaded to external servers (with the exception of the optional HumeAI TADA engine, which uses an external API).
Does Voicebox work on Mac and Windows? Yes. Voicebox has native installers for both Windows and Mac (Apple Silicon and Intel). Linux users can build from source using the project’s GitHub instructions.
Can I use Voicebox for commercial projects? Yes, Voicebox is released under the MIT license, which permits commercial use. However, always confirm you have the right to use any specific voice you clone, and check the licensing terms of whichever underlying AI model you choose to generate with.
Do I need a powerful computer to run Voicebox? No. Lightweight engines like Kokoro run smoothly even on modest hardware. Larger models like Qwen3-TTS benefit from a dedicated GPU but will still run on CPU, just more slowly.
Watch the Full Video Tutorial
For a complete visual walkthrough of every step in this guide, check out our full tutorial video on the AI BrainBox YouTube channel:
This 100% Free AI Voice Studio is Insane →
If you found this guide helpful, consider subscribing to the channel for more free AI tool tutorials, and drop any questions in the comments — we read and respond to all of them.